Thank you for using our guide to navigating the new online DMV Sales License process.
The initial form can be completed in 15 minutes (better than a day at the DMV).
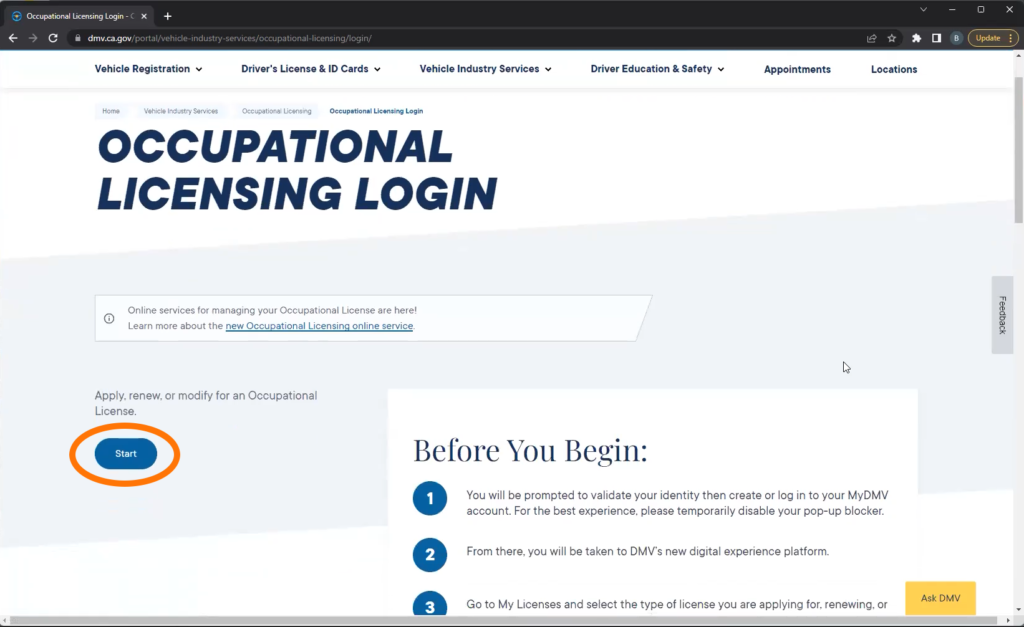
How to Start your online DMV Sales License application:
1.This link will take you to the beginning of the process:
https://www.dmv.ca.gov/portal/vehicle-industry-services/occupational-licensing/login/
2.Next select “Start”
.
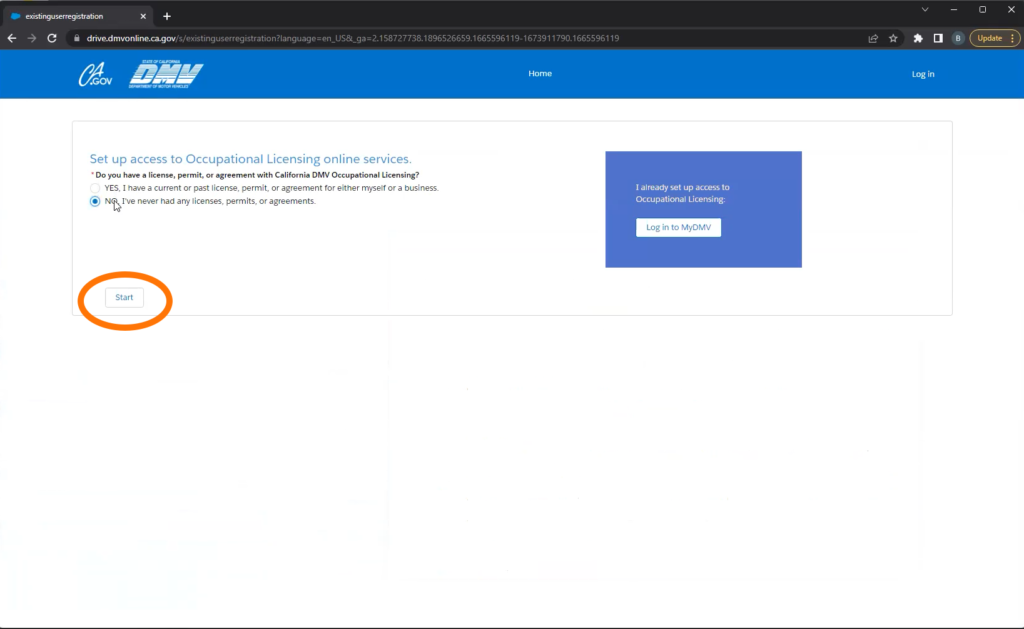
3.On the next screen you will be asked if you have obtained an occupational license before. Select “Yes” or “No” as it applies to you; then click “Start”
.
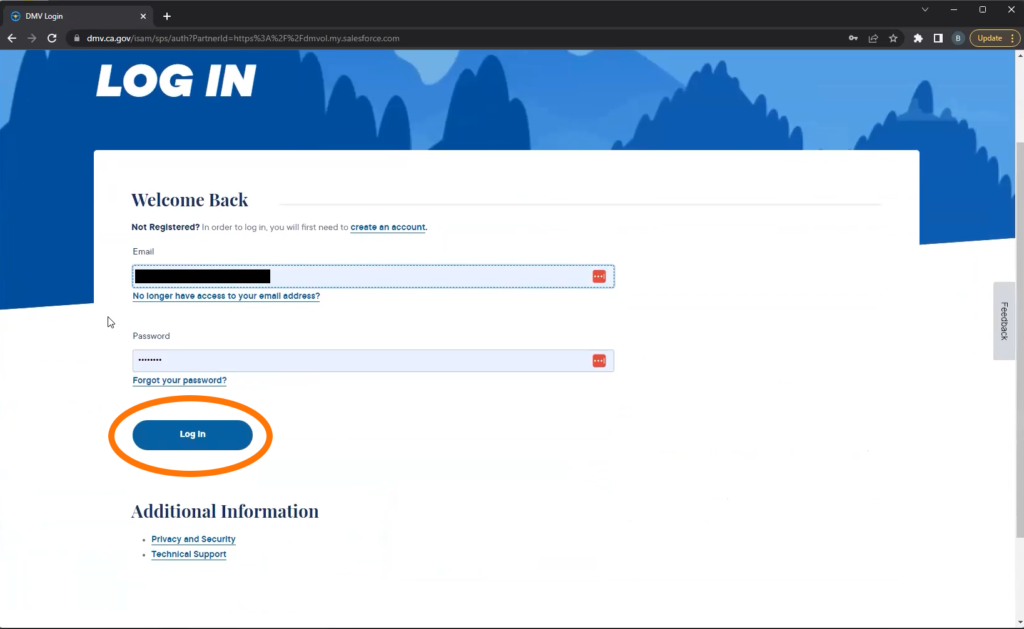
4. Log in to your DMV account. (IMPORTANT NOTE: if you have ever made a DMV account you MUST USE THAT or you will not be able to get your license.)
If you have not set up a DMV account before, click create an account then enter the information and follow the prompts.
.
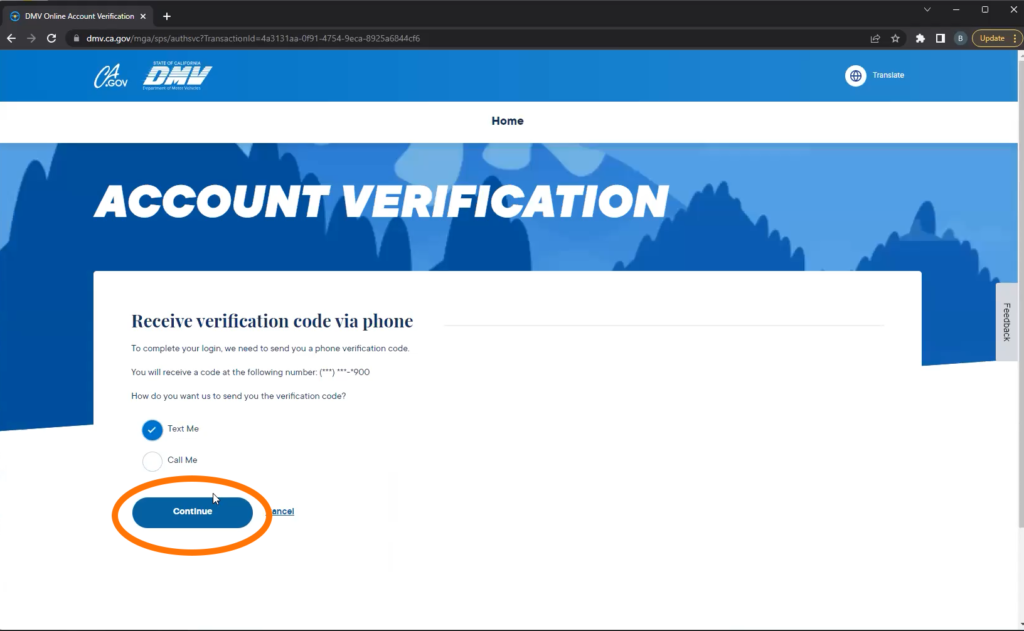
5. 2 factor authentication will require a verification code texted or called to you. Select your contact method and hit continue.
.
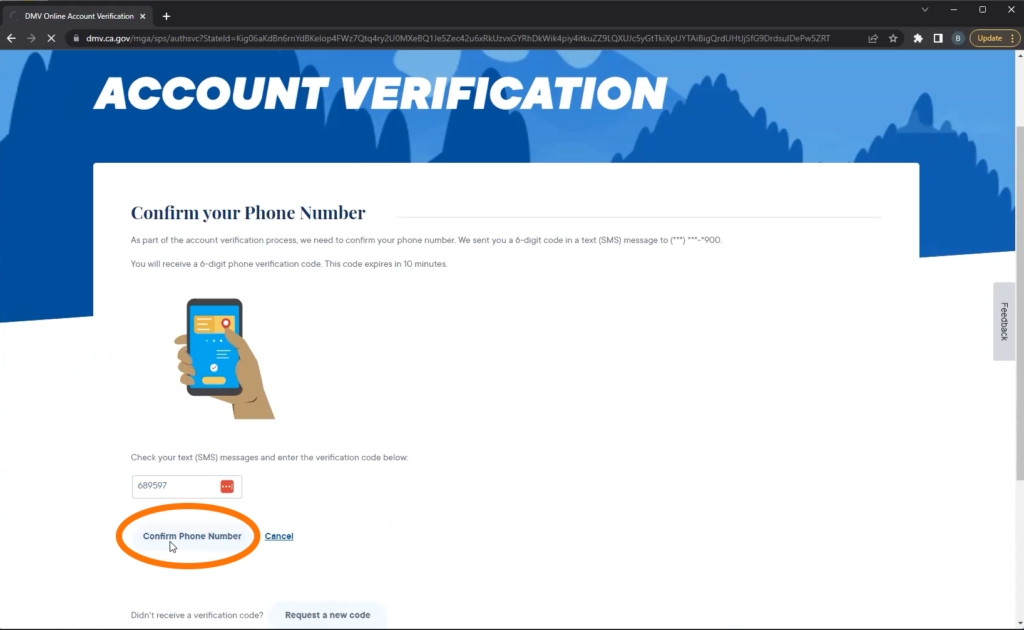
6. Enter the code and click Confirm Phone Number.
.
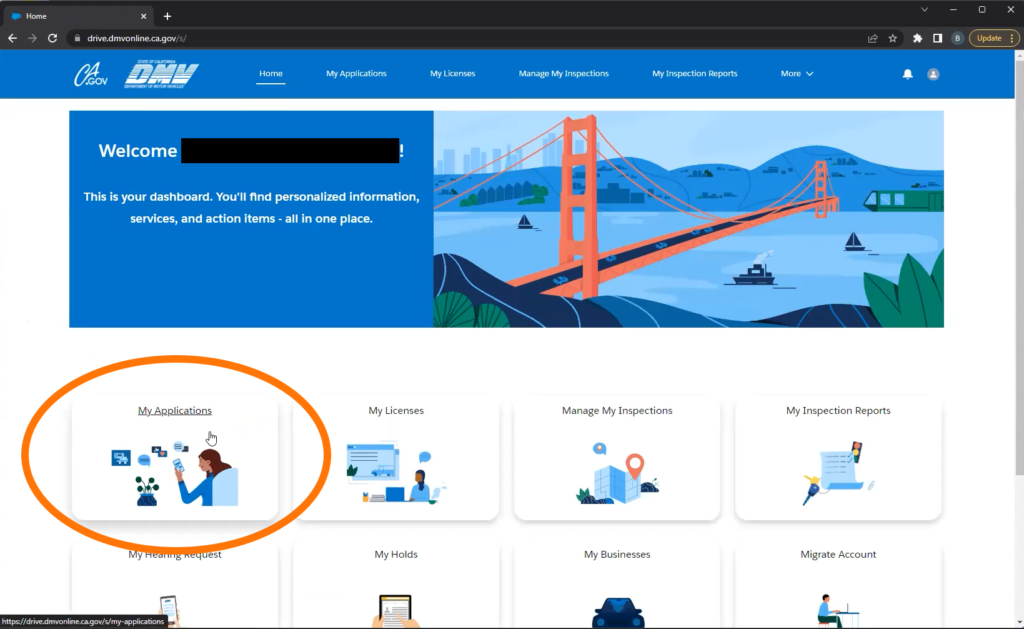
7. Now you will see the dashboard in your portal. Click on My Applications.
.
8. Select Apply to New License

.
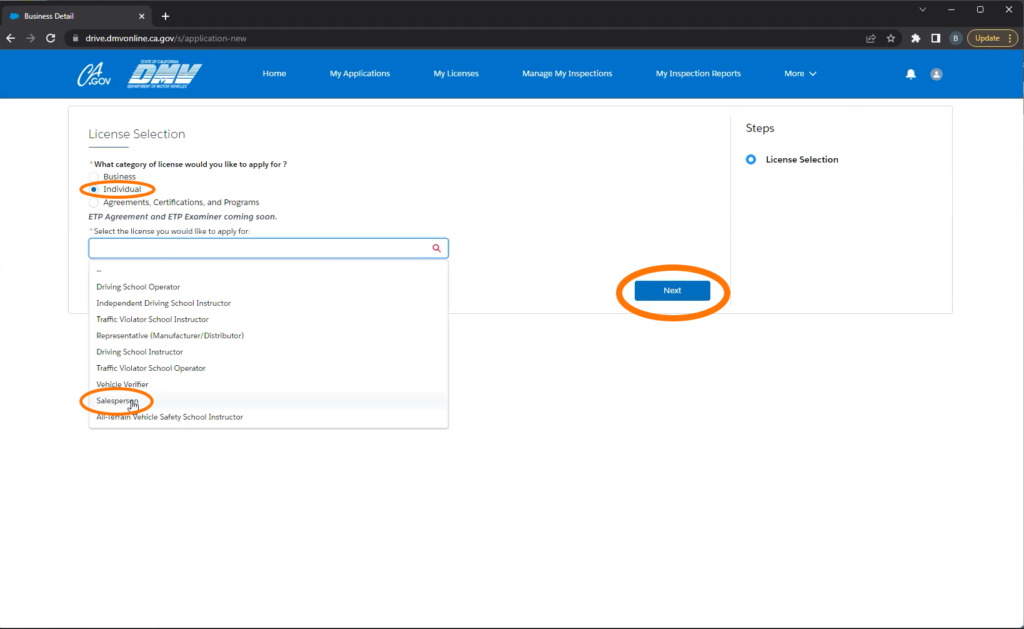
9. Select Individual, and then in the drop down select Salesperson. Then click next.
.
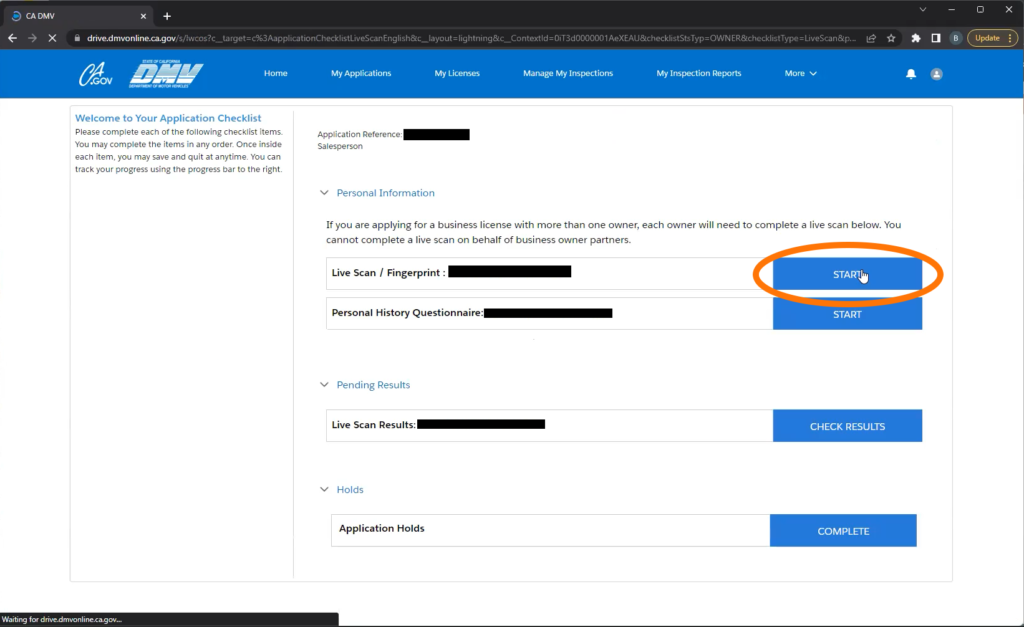
10. We are going in order for ease. Select the first Start button (next to Live Scan / Fingerprint)
.
11. Select Yes if you reside in California.
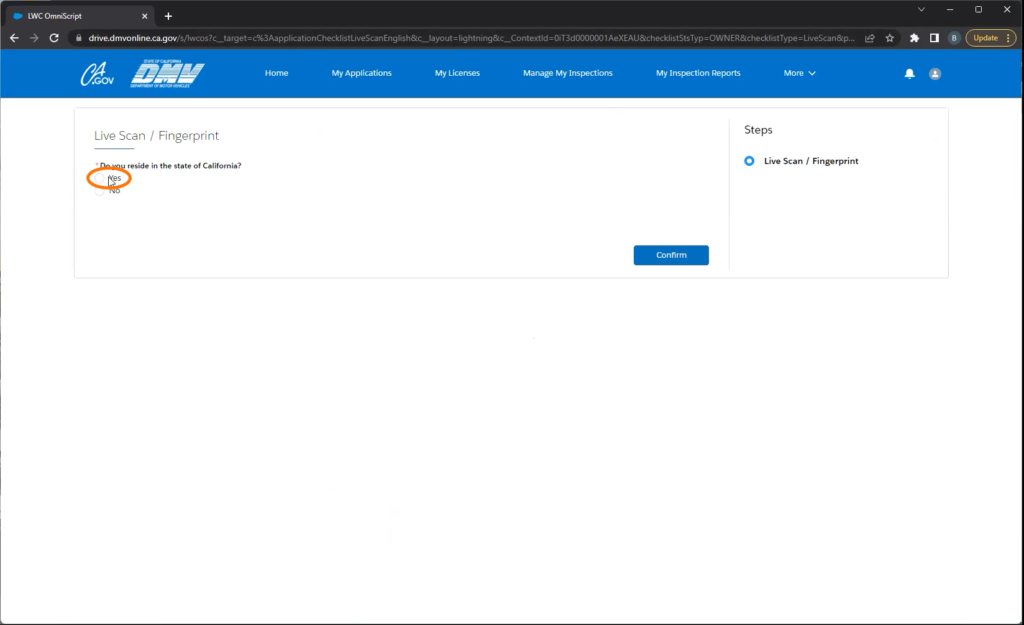
.
12. Next upload the copy of your Live Scan receipt and enter the ATI number (#24 at the bottom of your Live Scan form)
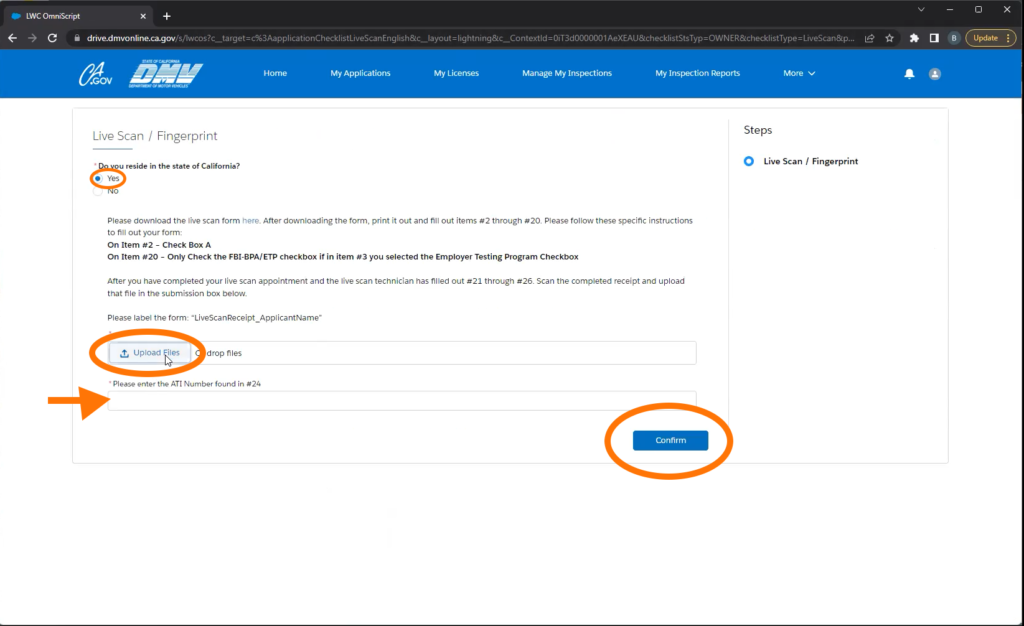
.
13.The first blue button should now say completed. Next select the second blue button (it says Start)
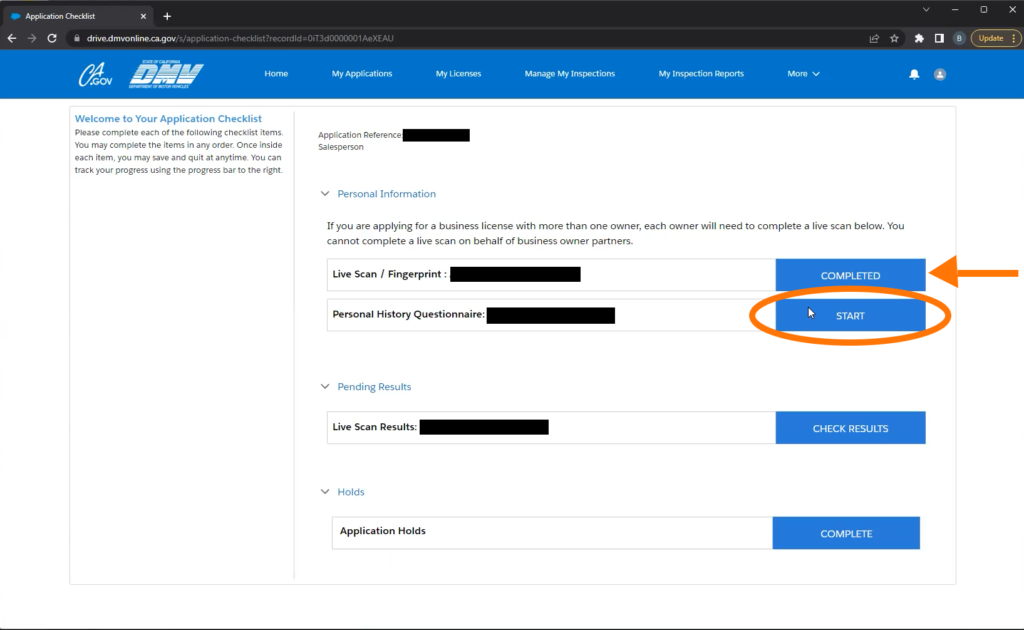
.
14. Fill in all the information fields and click Next.
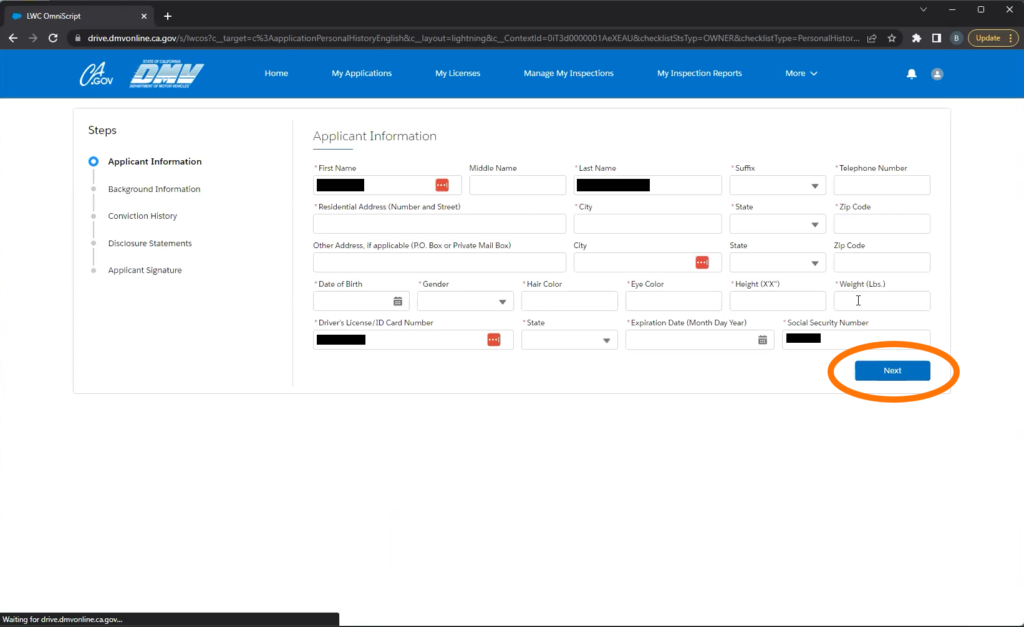
.
15. Certify your address is correct, then click Next.
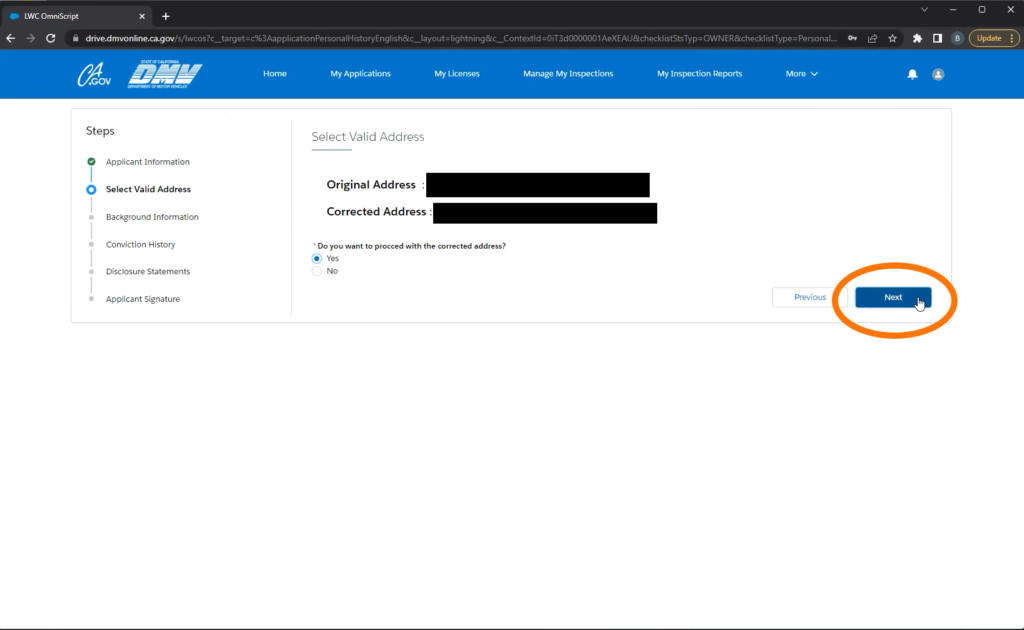
.
16. Answer all the questions.
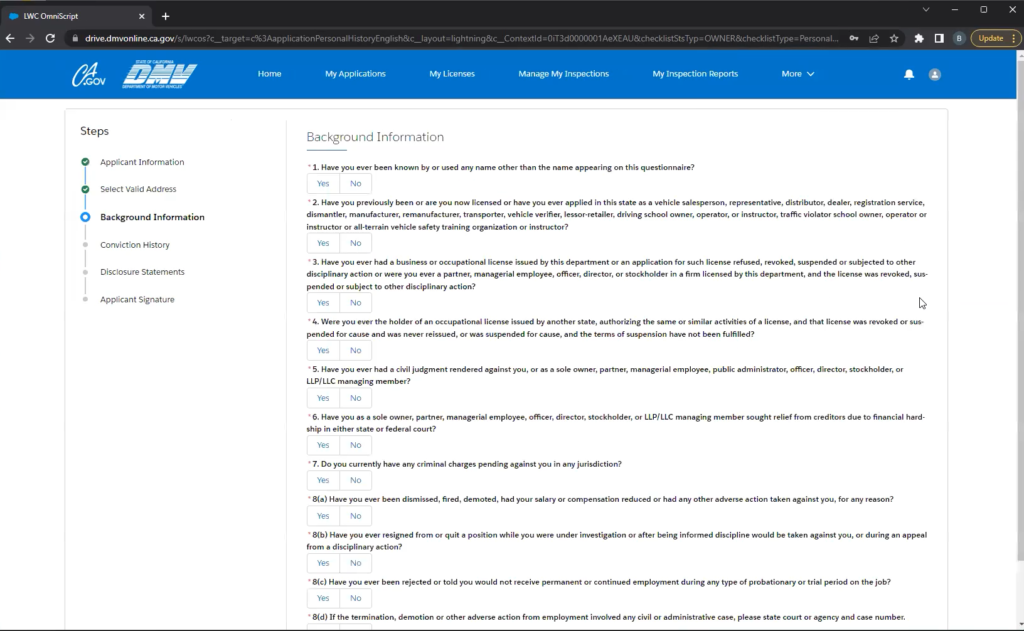

.
17. Initial after the notice and answer the question, then click Next.
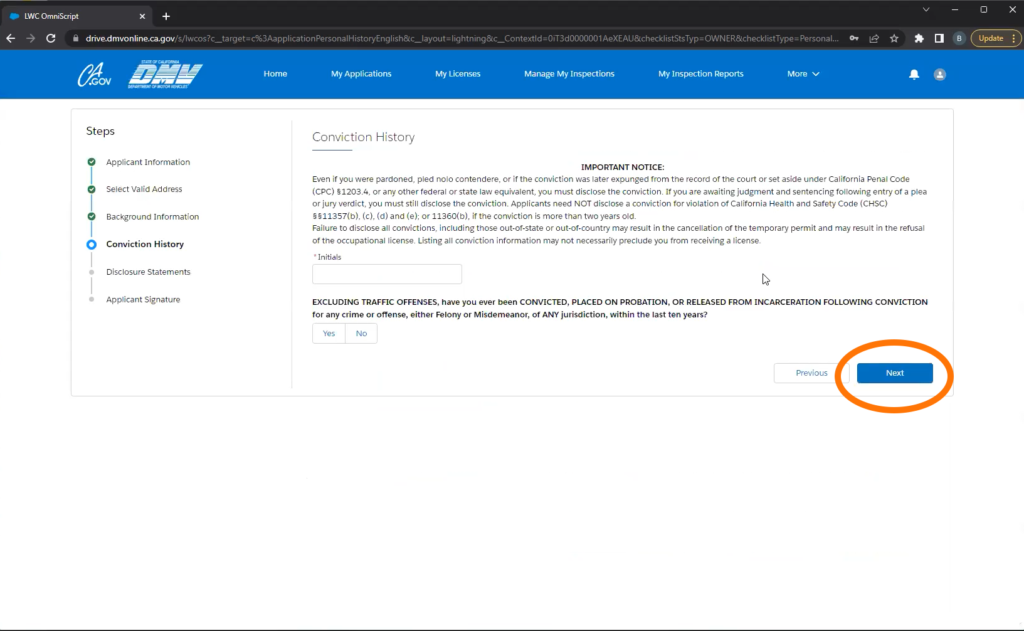
.
18. Read the disclosure then check the box certifying that you have read it all and click Next.
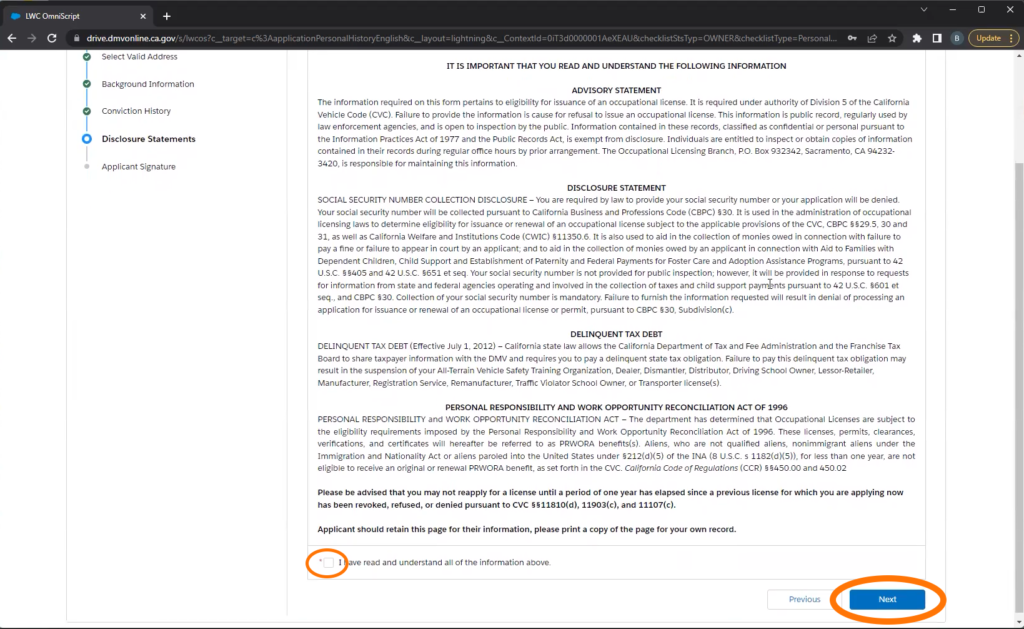
.
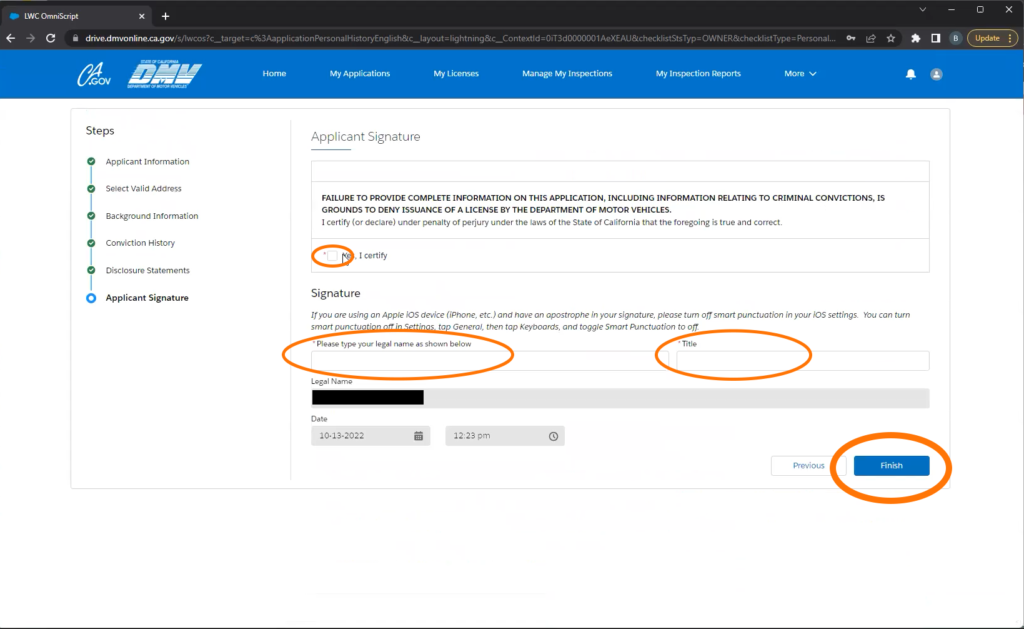
19. Certify that all information is correct, sign your name, then click Finish
Note: you may need to type your name in all caps to match their formatting.
.
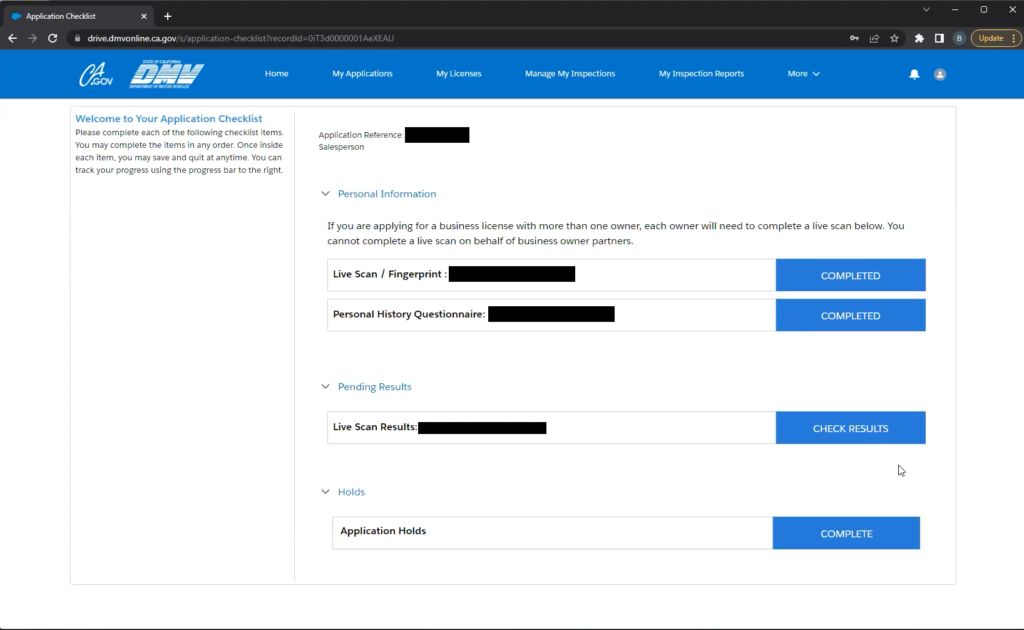
20. Your application checklist should now look like this:
.
It takes 3-7 days for your livescan to connect with your application so please check back later. You will receive an email from the dmv with the subject “New Information Notice”. It will say there is new information available in your account. Or you can check your account periodically for a notification. Once the Livescan is connected the 5th and 6th items will appear on your application checklist.
Once your Live Scan is connected:
21. Once your Live Scan and application have connected you will receive an email from the DMV with the subject line “New Information Notification”. It will tell you there is new information available in your DMV account. This is what they send you when there is an update to your application.
.
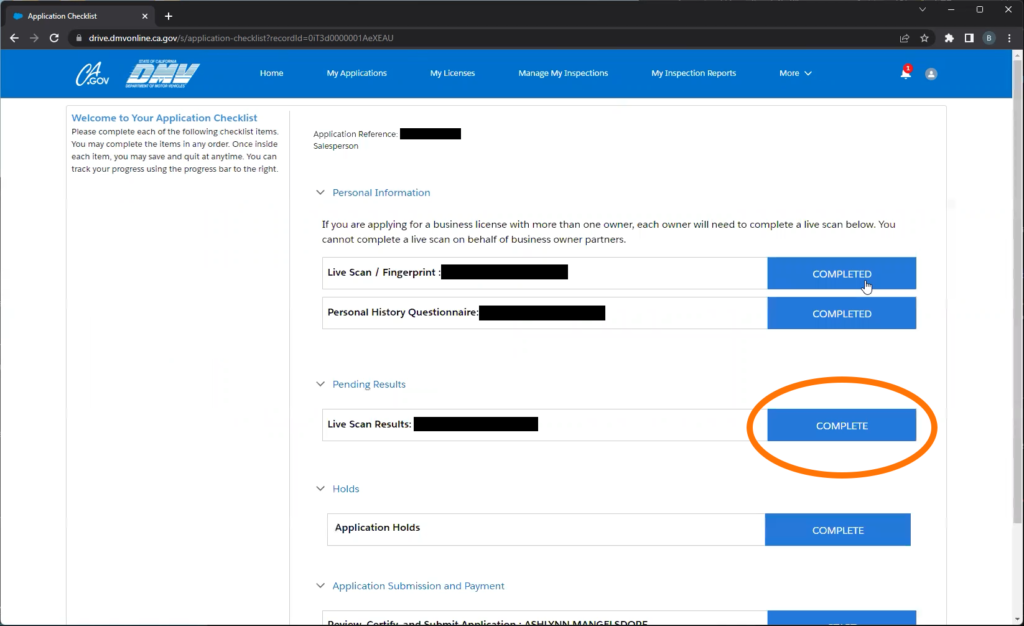
22. Go back into your application checklist and if it is ready your Live Scan results will now say Complete, and there will be 2 new items at the bottom of your checklist.

.
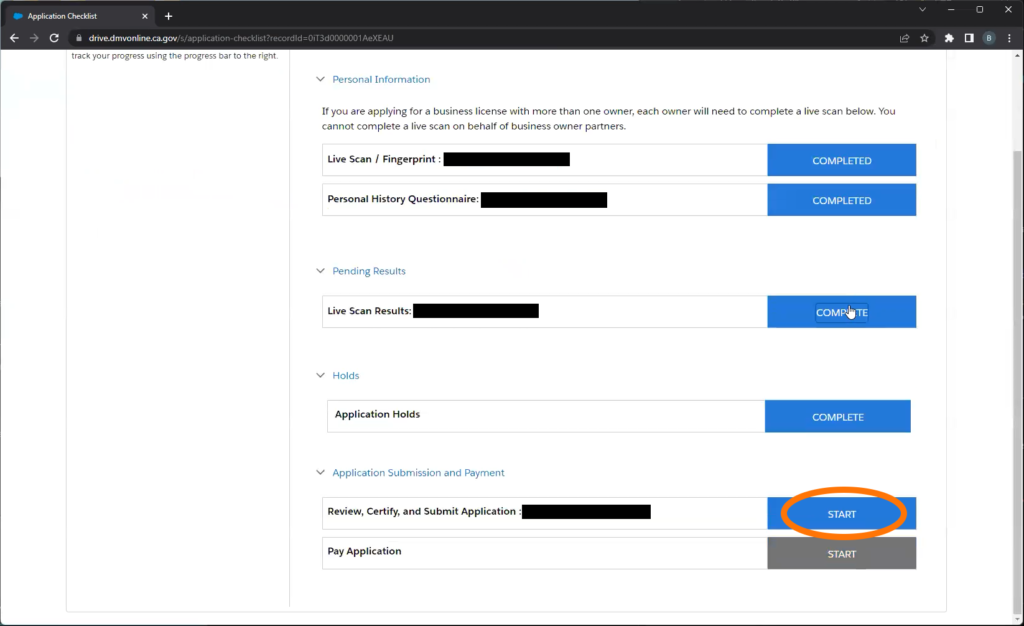
23. Next to Review, Certify, and Submit Application: (Your Name) click Start.
.
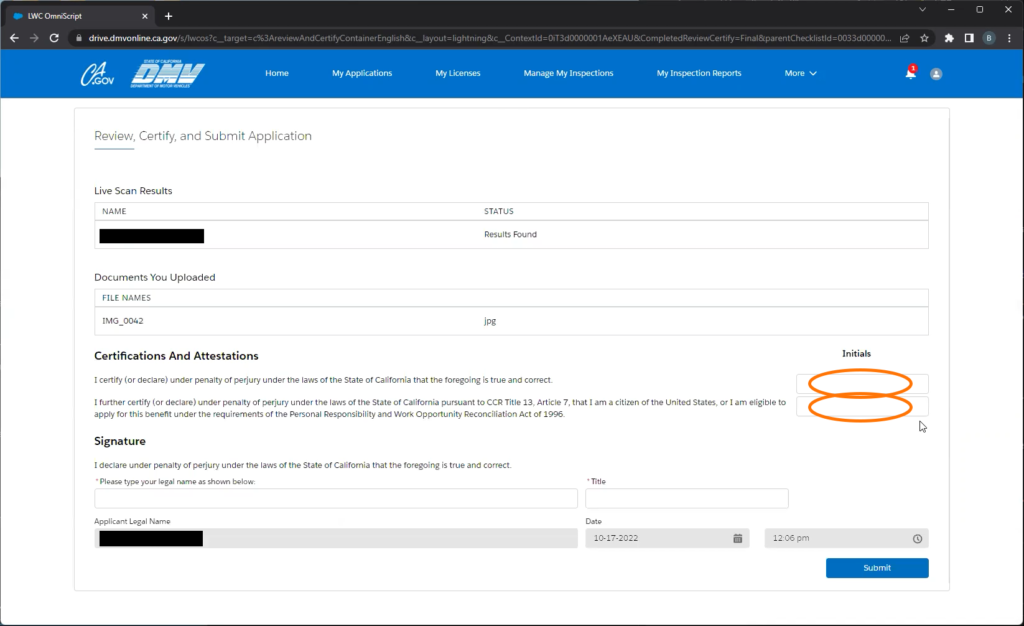
24. Read, then initial to certify that all information entered is true and correct.
.
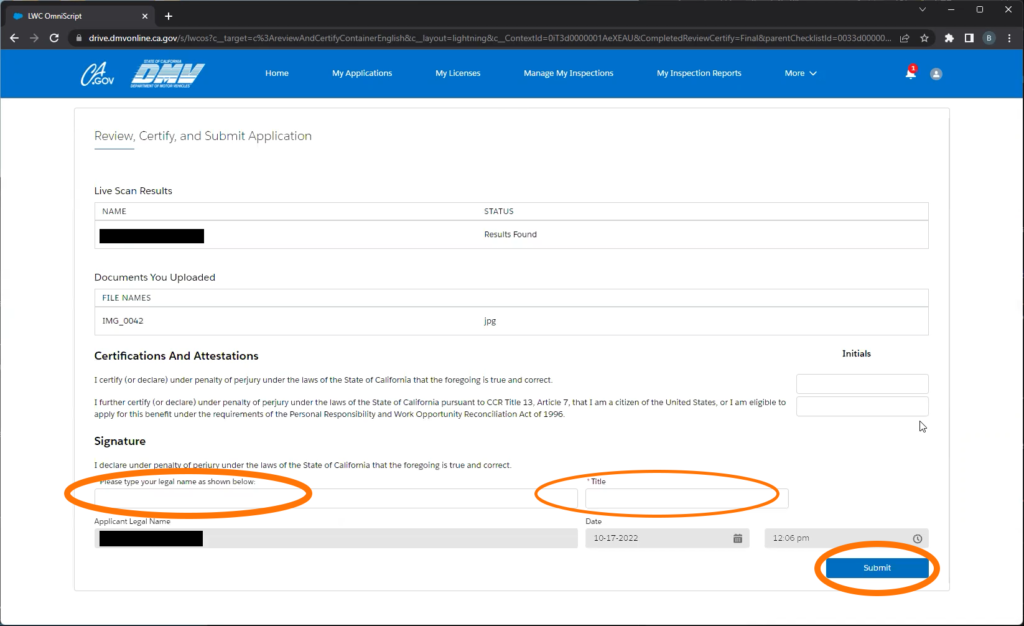
25. Sign by typing your name and entering your title (ex Miss). Then, click Submit.
Note: you may need to type your name in all Caps to match their formatting.
.
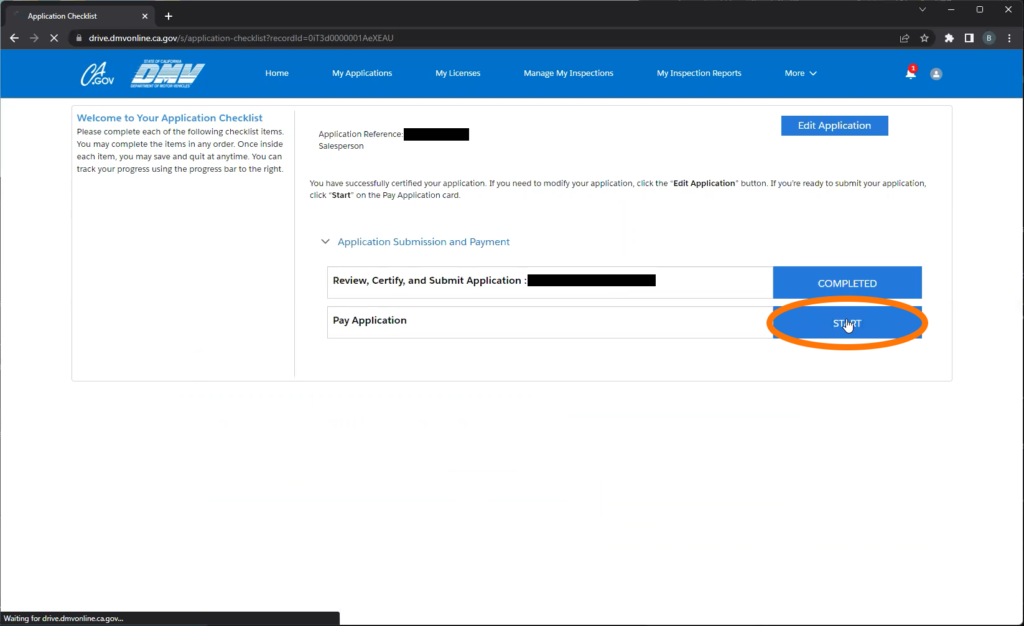
26. Next to Review, Certify, and Submit Application: (Your Name) should now say Completed. Next to Pay Application click Start.
.
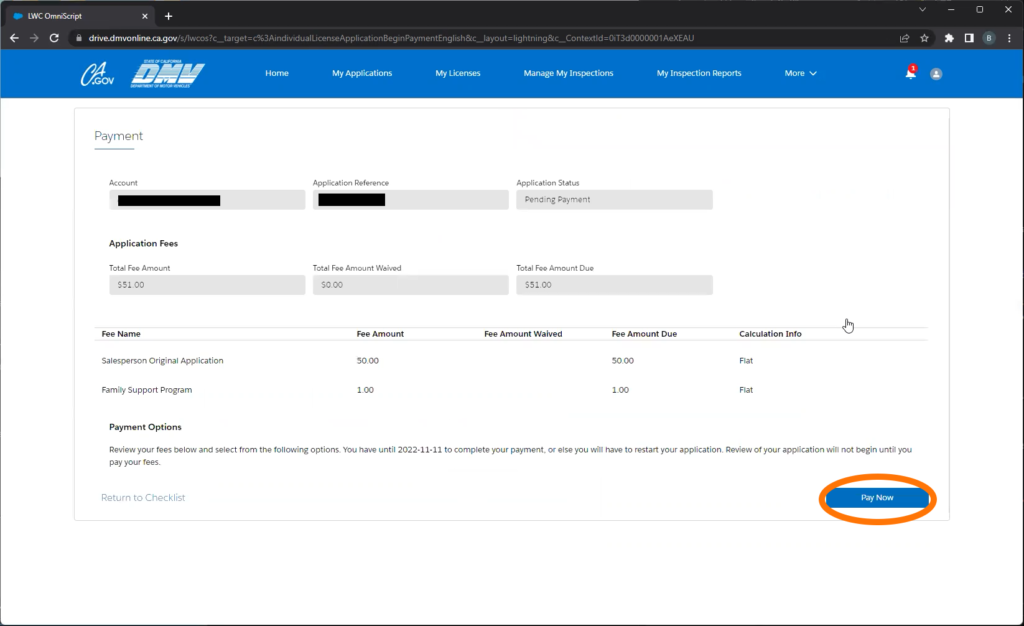
27. The Total Fee Amount should be $51. Click Pay Now.
.
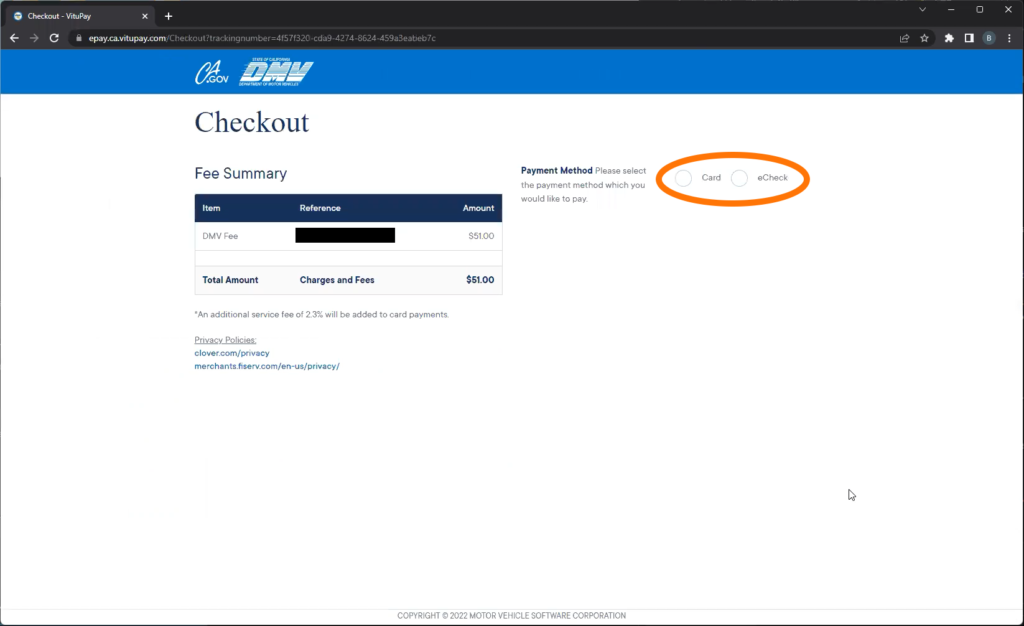
28. Select your Payment Method
Note: we are using eCheck for this example. If you choose to pay with a card there is a service fee. Your banking information for the eCheck can be found in most banking accounts even if you don’t have physical checks.
.
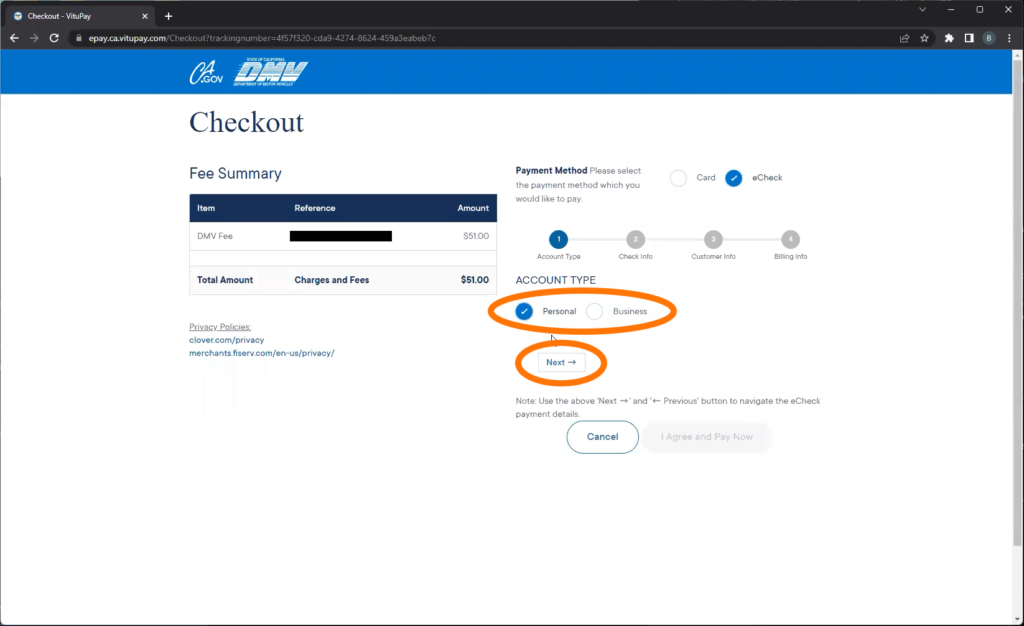
29. Select your Account Type then click Next.
.
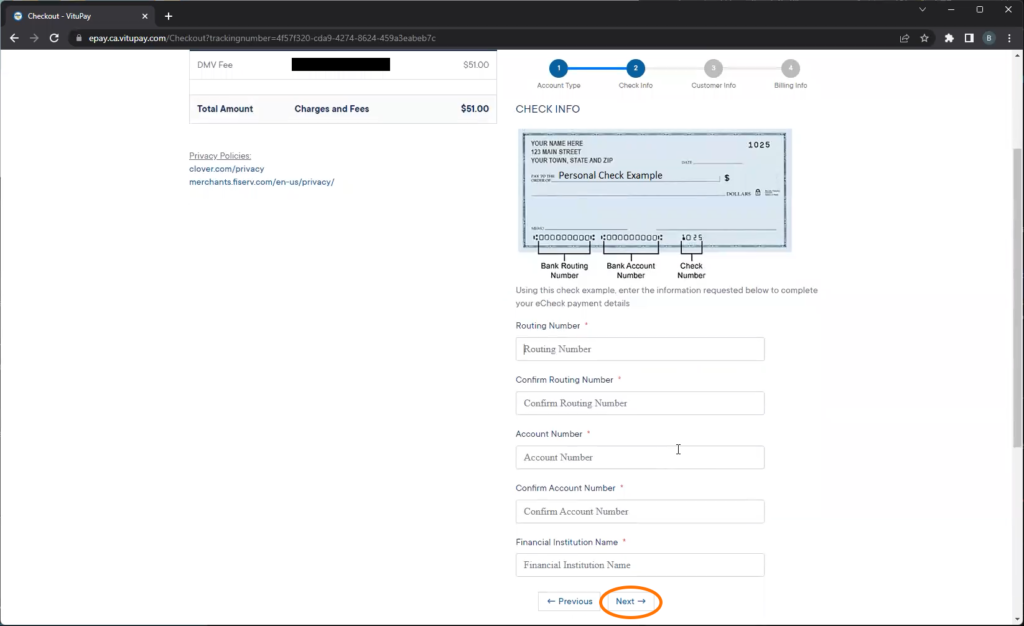
30. Fill in all your payment information, then click Next.
.
31. You will also need to enter your identification, your billing information, certify, and submit.
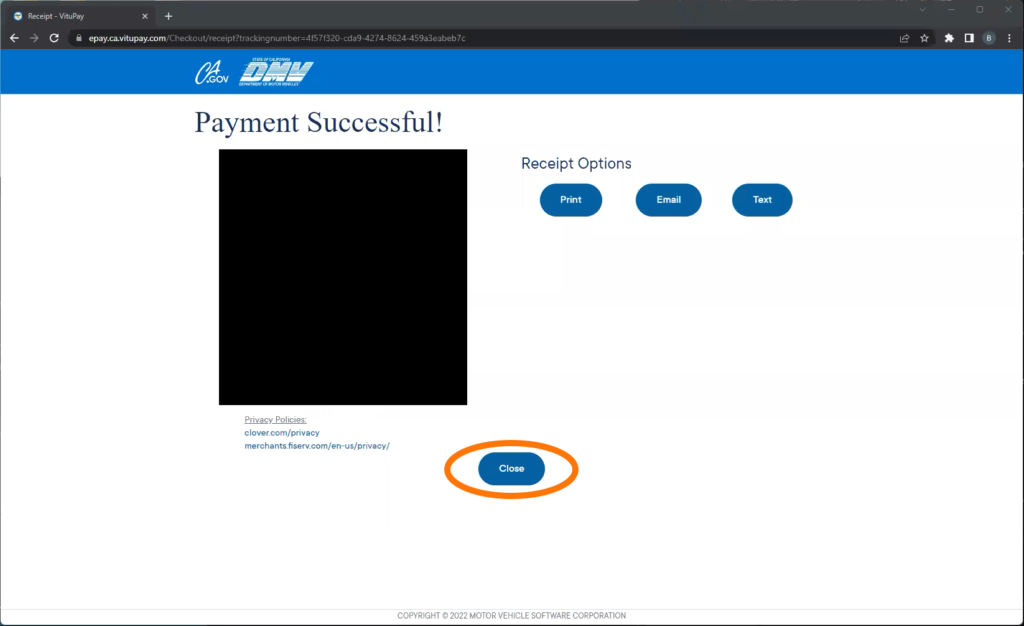
32. If the Payment went through you will see this Payment Successful screen. Don’t forget to save the receipt for your records. Then click Close.
.
33. You should now see the Application Submission Confirmation page. Don’t forget to save your application for your records.
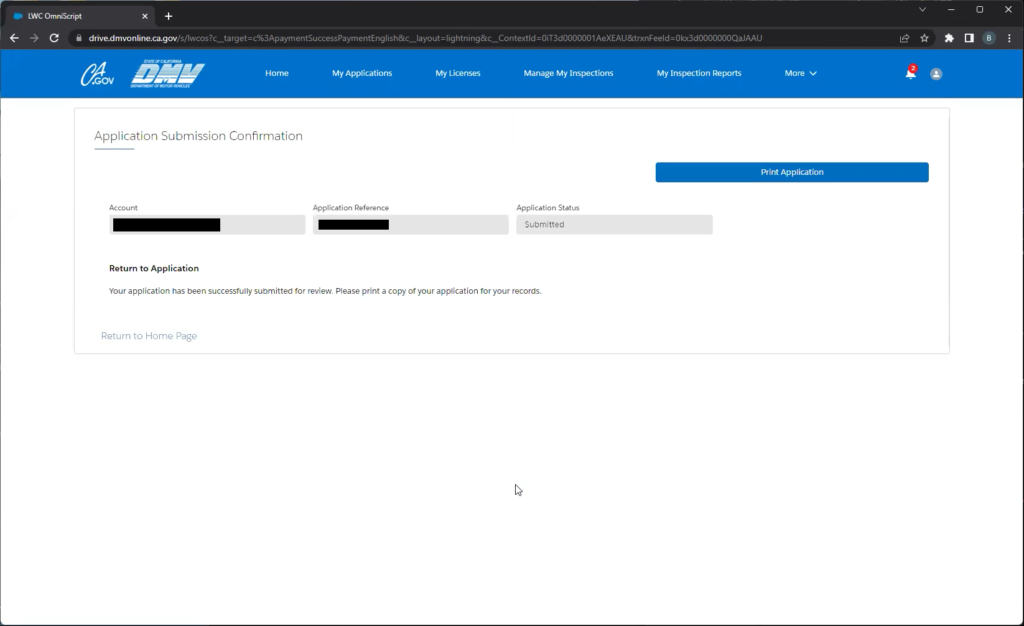
.
34. If you go back to your applications page, you will see the Status is now Submitted. From here it takes about a week for the DMV to process your application.
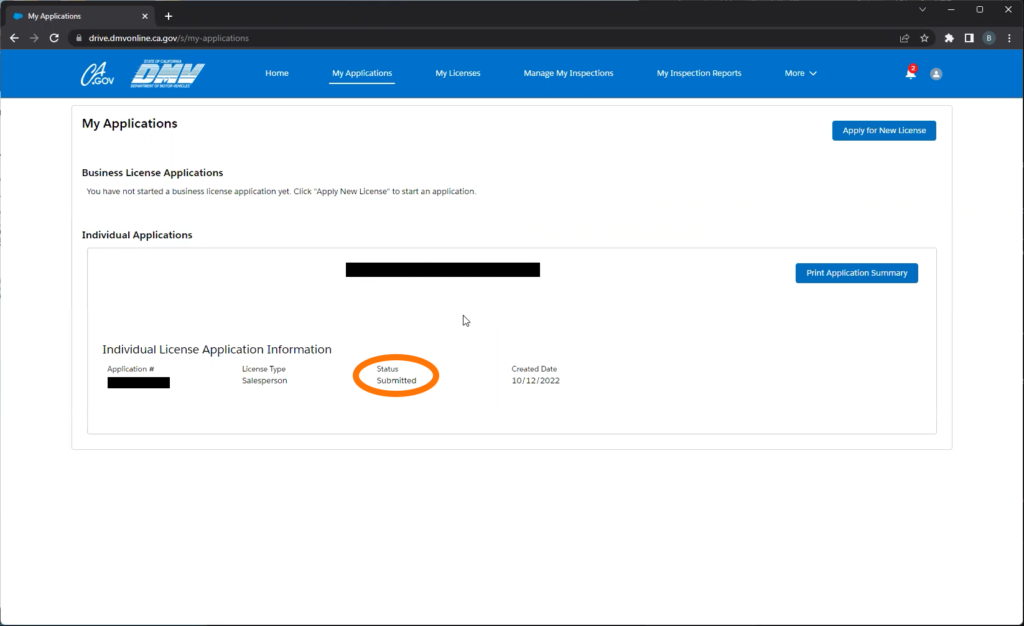
.
Once your Application is approved:
35. When your application is processed you will receive the same “New Information Notification” email from the DMV.
36. In your My Licenses page, your application Status will now say Active. To get a copy of your temporary license click Download License.
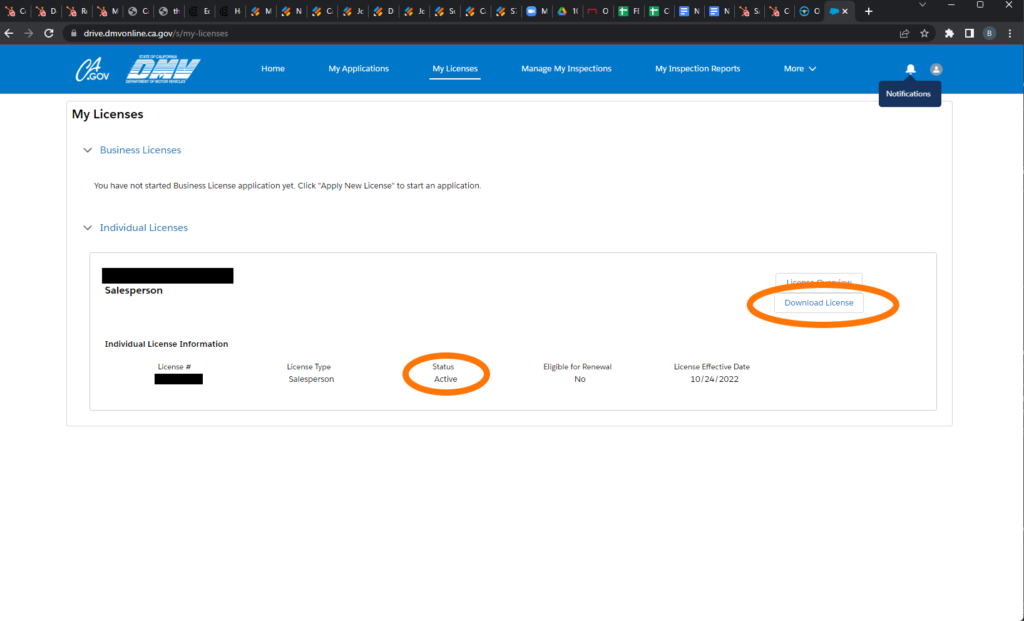
.
37. Once you download your temporary license, please upload it here: https://www.carblip.com/saleslicense/
.
How to get back into your application after a break:
1. Log into your account and verify your phone number again.
2. Select My Applications.
3. Select Launch Checklist
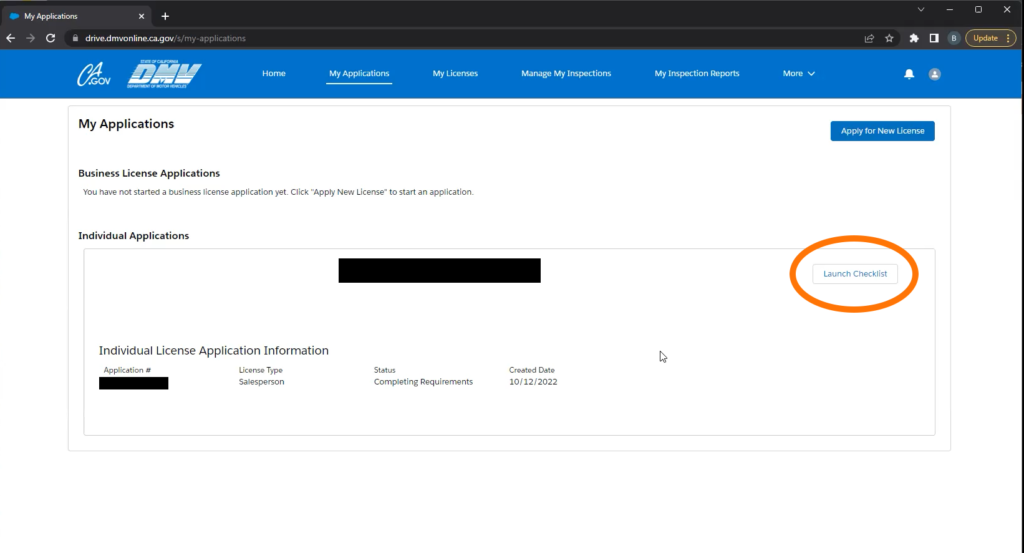
.
Written by Brynn
CarBlip provides customers with a digital car buying experience. With access to new car inventory across the nation, your dedicated concierge will find the car that meets your needs and deliver it directly to your door. And best of all, our service is free.

